


filmQA pro™ units window
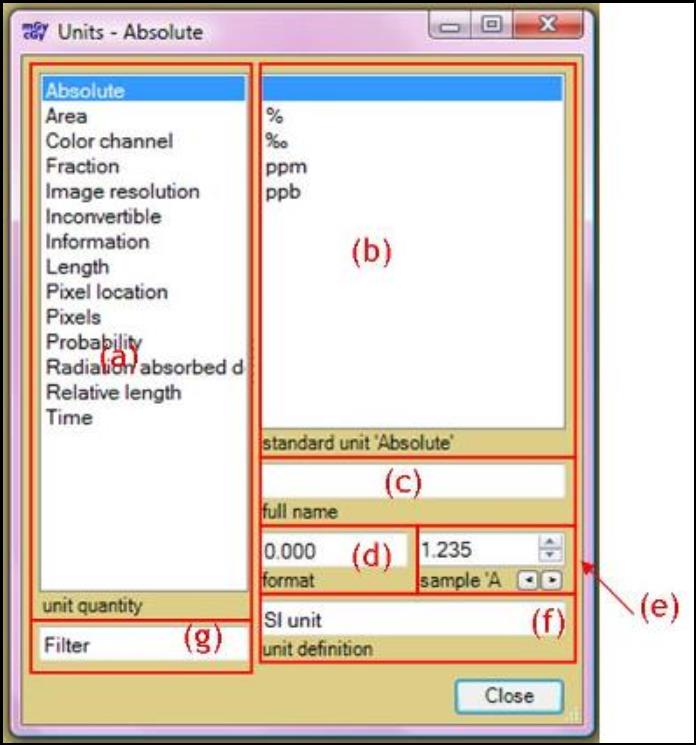
The Units Window can be located via “Data” under “Menu” panel. It allows you to change the setting and format of units in the software.
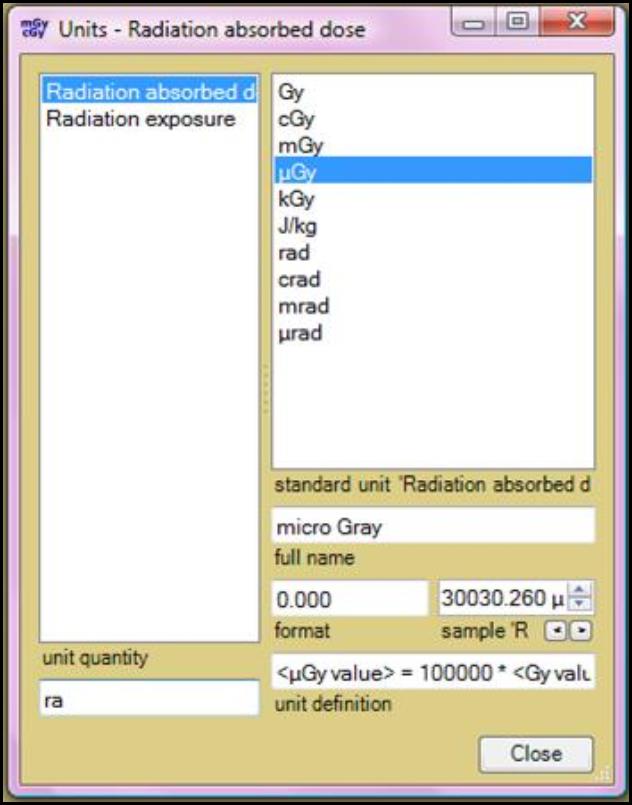
(a) The “unit quantity” panel allows you to select different units of measure for display and editing. Right click inside the panel to reset to the default unit system.
(b) The “standard unit” panel allows you to set the standard unit for the particular measurement selected in the “unit quantity” panel, (a), and to display the name, format, and definition of the unit selected.
(c) The “full name” panel displays the full name of the unit selected in the “standard unit” panel, (b).
(d) The “format” panel allows you to change the number format of the unit selected. See “Number Format Buttons” for examples and descriptions.
(e) The “sample” panel shows an example of the number format in the “format” panel, (d). It allows you to enter number for testing.
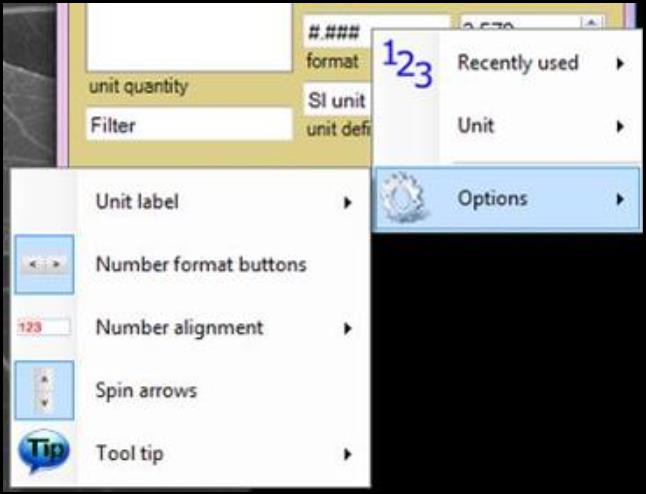
- Right click in the panel and:
- Select “Recently used” to view and select among examples that have been previously displayed. *
- Select “Unit” to change the unit selected in the “standard unit” panel.
- Select “Options” and then
- “Unit label” allows you to change the location of the units displayed in the “sample” panel
- Check or uncheck “Number format buttons” to display the “Number Format Buttons” on the “sample” panel.
- “Number alignment” allows you change the location of number displayed in the “sample” panel.
- Check or uncheck “Spin arrows” to display the “Spin arrows” on the “sample” panel. “Spin arrows” allow you to increase or decrease the number in the “sample” panel in 0.1 steps.
- Select “Tool tip” to display options for the number and unit in different format as the cursor is pointed to the number in the “sample” panel.
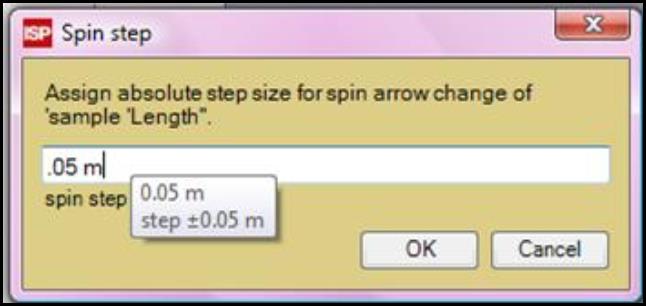
- Right click on the “Spin arrows” and
- Select “Change step size” to open the “Spin step” window which allows you to assign absolute step size for spin arrow change.
- Select “Recently used step size” to choose the step size that’s recently used.
- Select “Predefined step size” to choose from a list of the step sizes.
- Uncheck “Unit dependent step size” to have the step size change with the unit selected in “standard unit” panel.
- Select “Alignment” to change the location of the spin arrows.
- Check or uncheck the “Spin arrows” to show or hide the buttons.
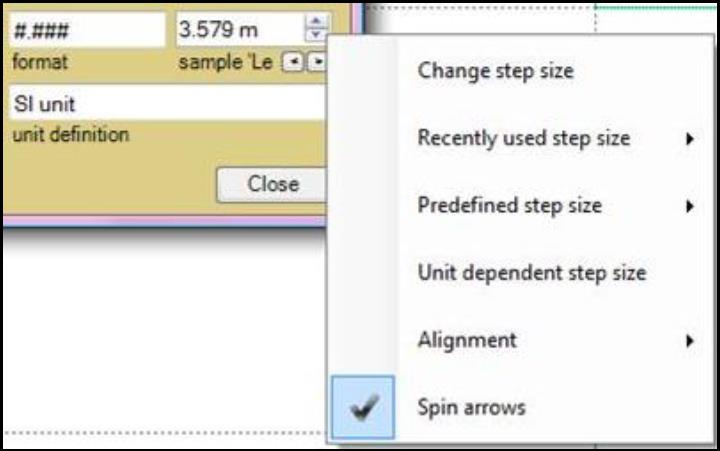
- Select “Change step size” to open the “Spin step” window which allows you to assign absolute step size for spin arrow change.
(f) The “unit definition” panel gives the definition of the selected unit in terms of SI unit. Right click inside the panel to define the unit from the standard unit to the SI unit.
(g) The “Filter” panel allows you to enter a filter string to reduce the number of visible list entries in the “unit quantity” panel, (a). Empty the filter string to show all the items. Right click inside the panel and:
- Check “Start with” to leave only the items that begin with the same letters as those in the string. For example:
- Check “Ignore case” to turn the case sensitivity off.
read more >