


filmQA pro™ physics QA flatness symmetry double scan
Step-by-step Flatness Symmetry Double Scan
‘Flatness and symmetry physics QA (double scan)’ object uses both portrait and landscape scan of the same film to avoid lateral scanner effect entirely and maximize the signal to noise ratio. The CAX value of flat field together with a piece of unexposed film is used to rescale the calibration and compensate both for orientation change and for scan to scan variations of scanner and films.
Add a ‘Flatness and symmetry physics QA (double scan)’ object to your case.
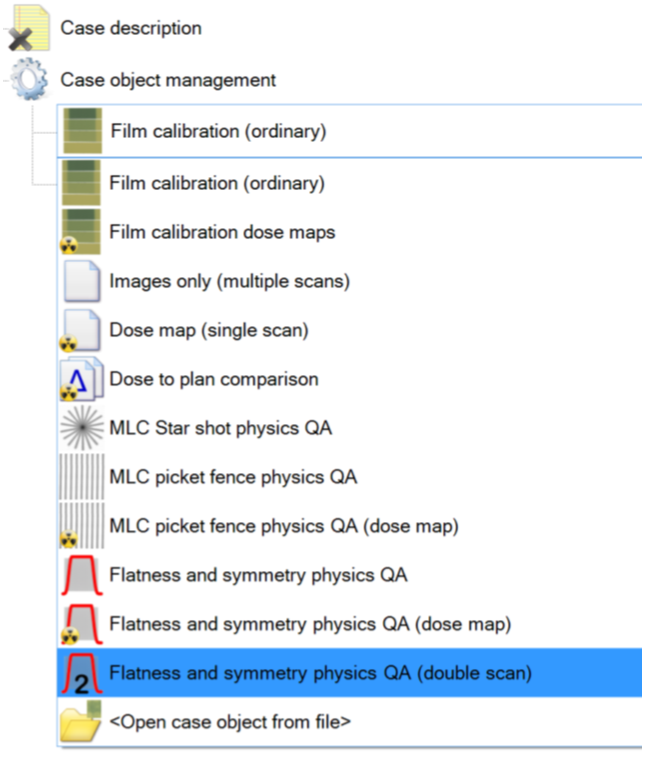
The other two types of ‘Flatness and symmetry physics QA’ objects are using only single scan to anlyze and the instruction are available at ‘Flatness Symmetry’ item.
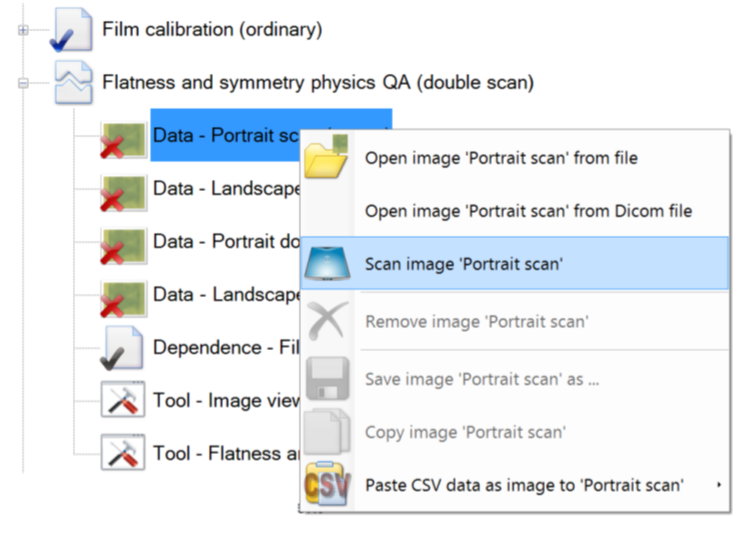
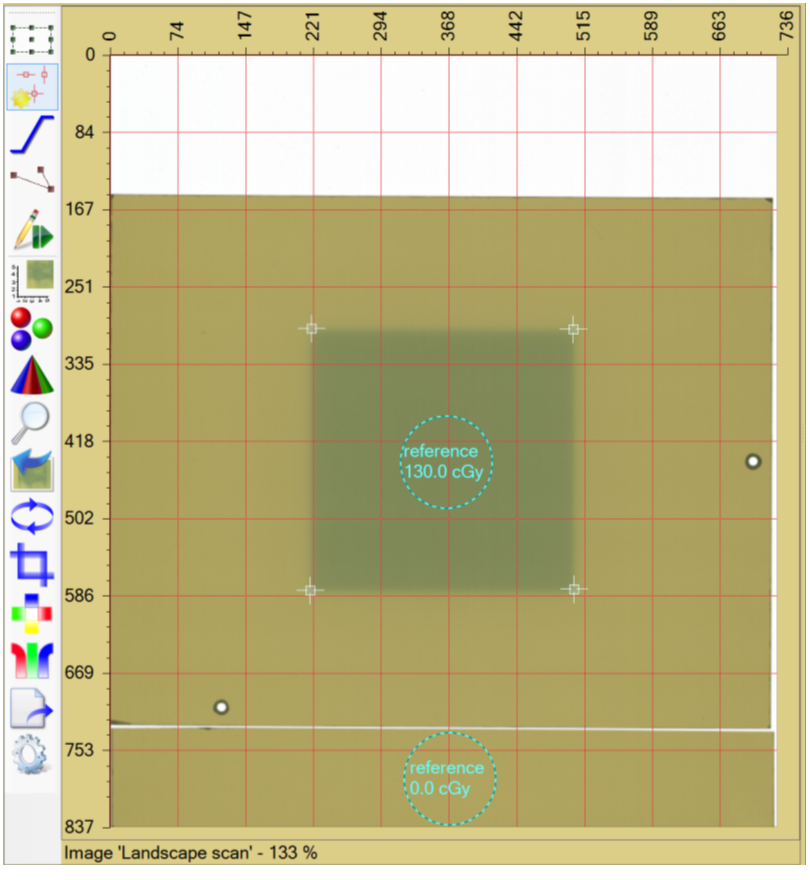
Acquire the portrait scan of the film with the flat field exposure - either read the image from file or scan it directly.
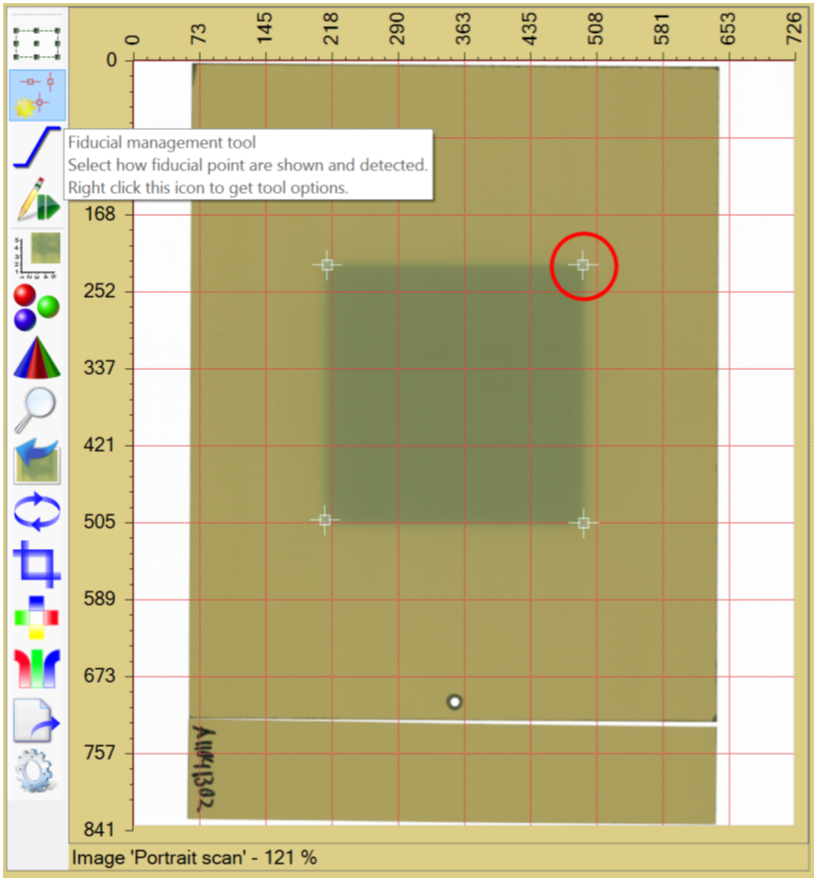
Select the fiducial tool  and set the fiducials to mark the isocenter axis or as shown below mark the corners of the flat field with ‘general fiducials’ (see red circle mark).
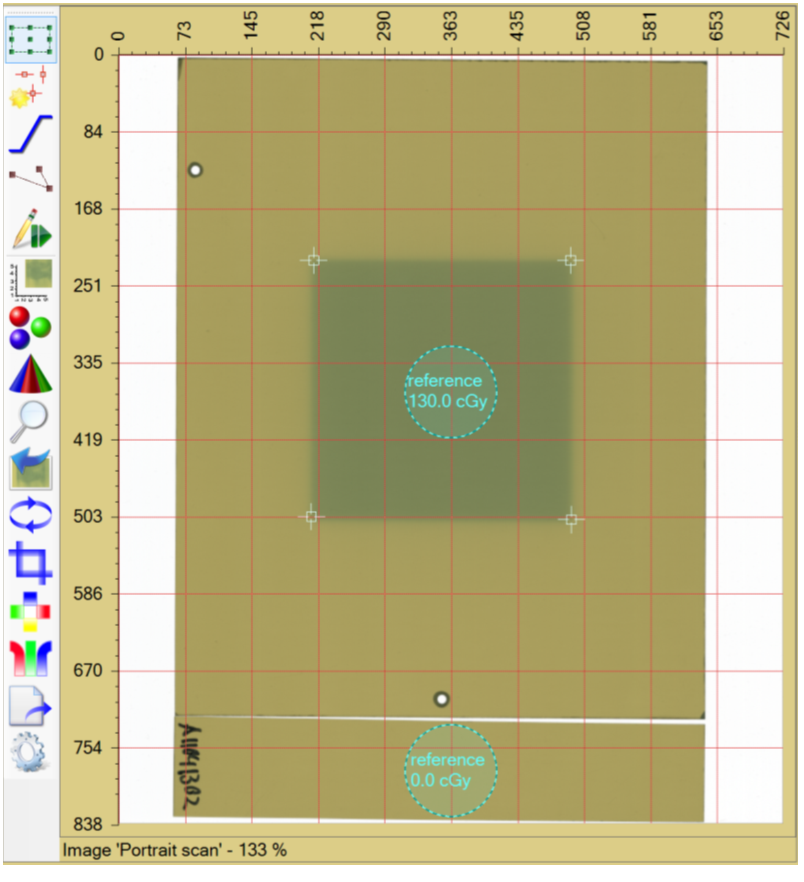
Set the regions of interest to rescale the calibration and assign the dose values of 130 cGy and 0 cGy as shown below (right click frame to assign dose value). The unexposed film strip must have the same orientation (relative to the sheet it was cut from) as the film with the flat field.
Acquire the landscape scan of the film with the flat field exposure - either read the image from file or scan it directly. Follow the same steps as explained abive for the portrait scan. The resulting landscape image with fiducials and calibration regions should look as shown below. Note that the unexposed film strip in the image below is a different cut of film as shown in the portrait scan, i.e. 2 strips of unexposed film with perpendicular orientation are used.
If both the portrait and the landscape images are comleted, right click the treatment object and select the ‘Recalibration using reference regions’ method as shown below.
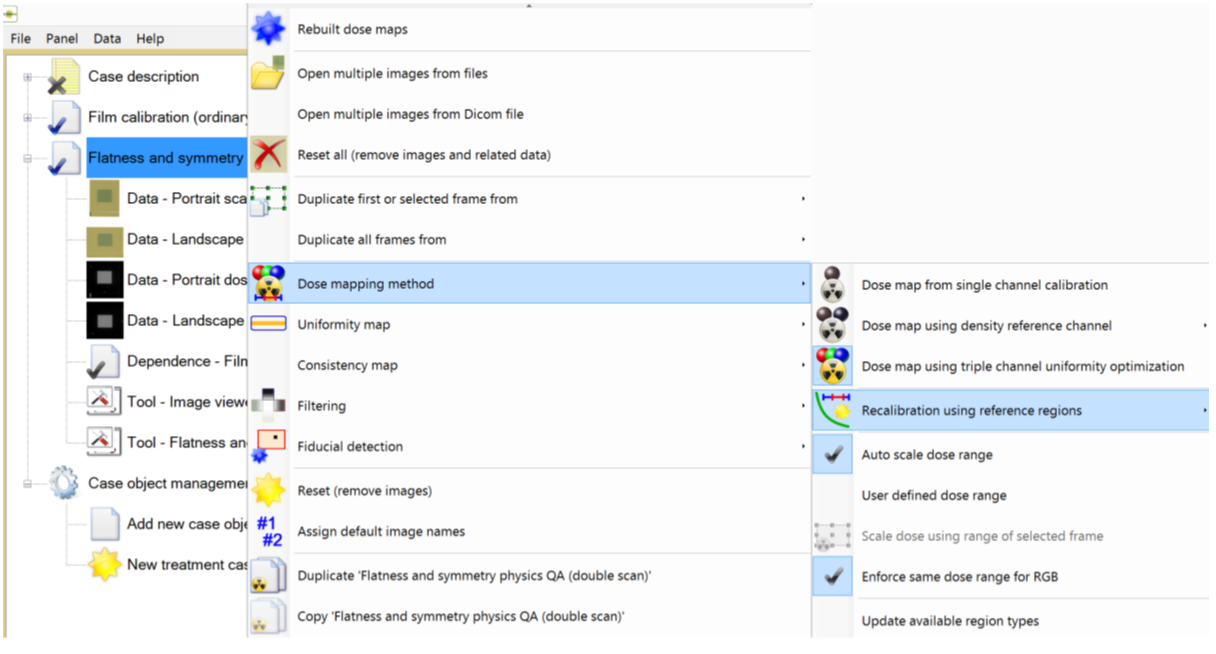
Select the default method marked with a yellow star, then select ‘Rebuilt dose maps’.
After all dose maps are calculated the icons in the treatment object should look as shown below.
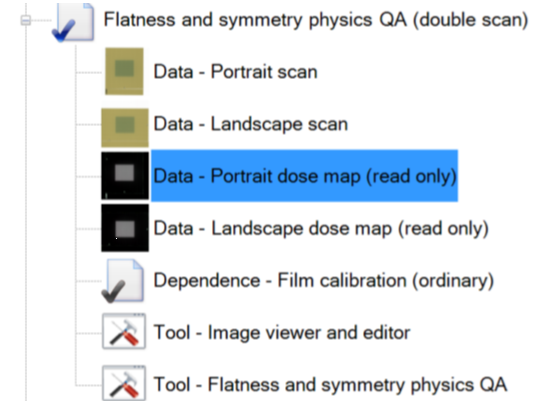
Select one of the dose maps as shown above, then start the flatness symmetry tool by selecting the ‘Tools—Flatness Symmetry Physics QA’ item in treatment object.

Fit for both images the isocenter—use the  tool and selecting the wanted type of fit (see below).

The flatness and symmetry tools automatically assigns the vertical analysis path in the portrait scan and the horizontal and analysis path in the landscape scan.
The remaining part of the flatness symmetry analysis is the same as used for the other ‘Flatness symmetry physics QA’ objects.
read more >