


filmQA pro™ ordinary film calibration
Calibration in filmQA pro™ is carried out using a single scan of 3-5 exposed film strips and an unexposed film. Fitted calibration function have only 3-5 parameters and additional calibration patches are not necessary.
This instruction set is using the images of the RapidArc example that is part of the installation.
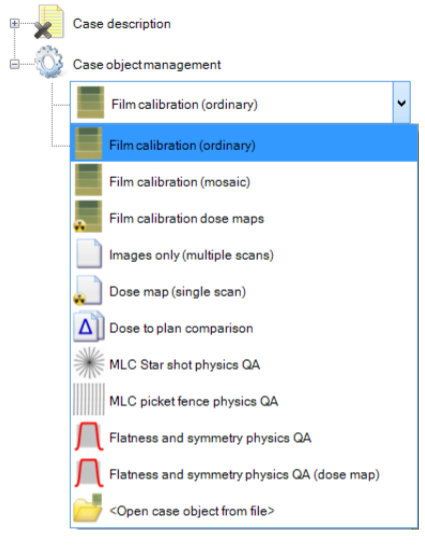
Add a “Film calibration (ordinary)” object to your case.

Acquire the calibration image by either reading it from a file or scanning it directly.
To mark the Regions of Interest (RoI), select the "Selection frame tool" icon  and choose the RoI at the calibration image as shown below:
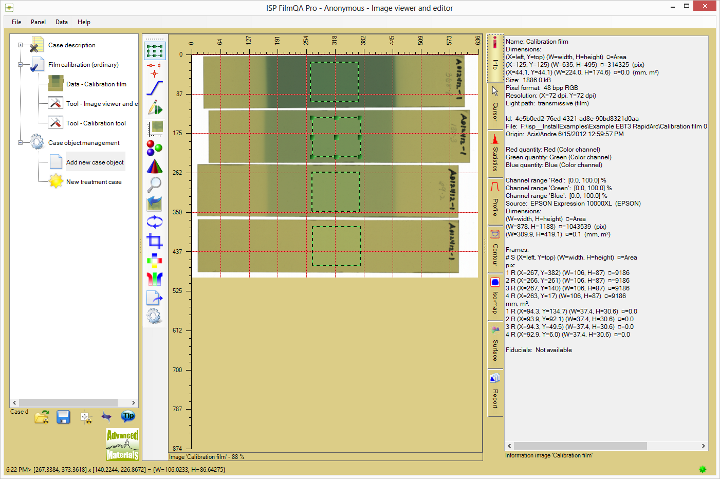
Tip: To move a RoI, select it and either drag it with the mouse pointer or use Ctrl+Arrow keys. To move All RoI at the same time use Ctrl+Alt+Arrow keys. To delete a RoI, select it and press Del key.
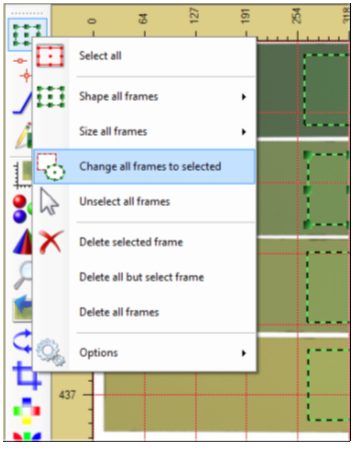
Tip: RoI can have various shapes,. Right click a frame to change shape or assign its area or size numerically, or right click the button for additional options as shown below:
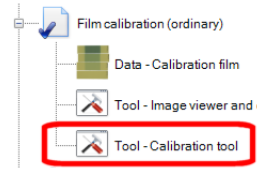
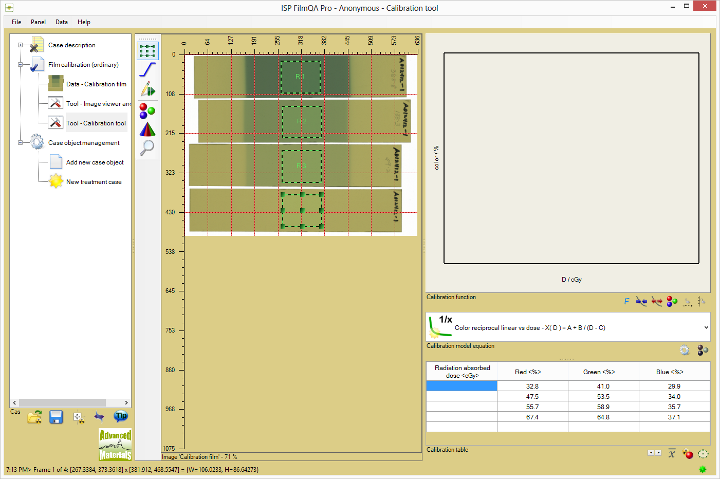
Select the calibration tool in the "Case data selector" as shown below.
By default the calibration table at the lower right is in the manual mode (color values in the table can be entered directly), press the  button to change to the automatic reading mode (read average values of the set RoI and assign them to the table). Button changes to
  and the screen looks as shown below:
Enter the calibration dose values in the very left column of the calibration table.
Tip: Measurement unit can be changed by right clicking the column header.
Tip: One can copy and paste dose values by right clicking the dose column and select "Paste to dose colum starting at ..." . Each installation example includes a text file "Exposures.txt" with the used dose values.
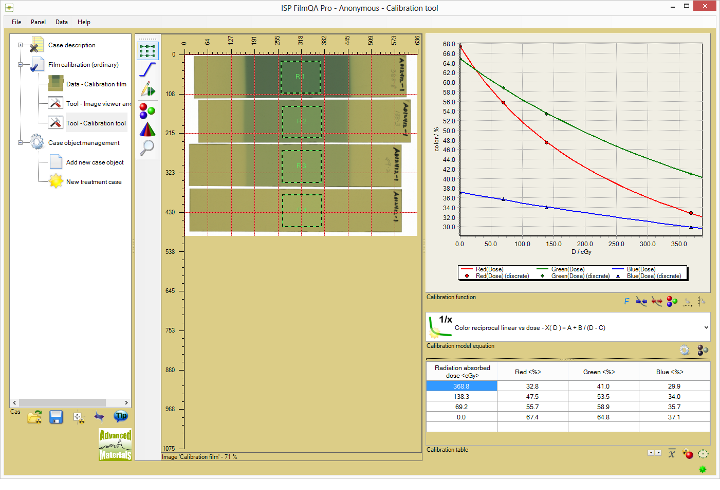
After entering All dose values in the calibration table (all rows are completed), the calibration functions are correlated automatically and both the fitted function and the calibration data are displayed as shown below.
Tip: The fitted function parameters can be displayed using options available at the  button.

The RoI can be adjusted in size and location to optimize the consistency—click and drag the RoI to adjust and all values are updated in real time.
Tip: One can export the final calibration function as ‘fixed calibration’ (calibration that cannot be changed anymore) by right clicking the calibration object as shown below:
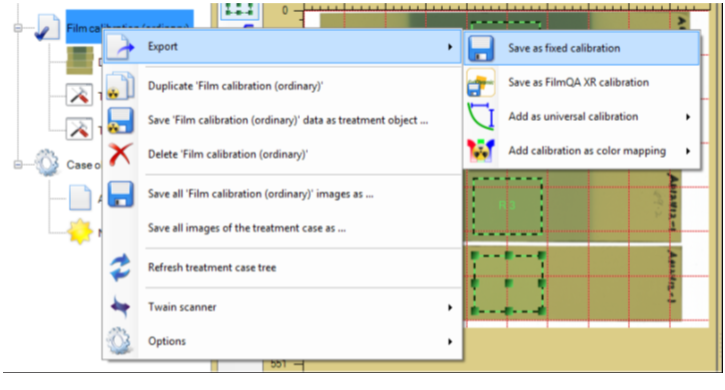
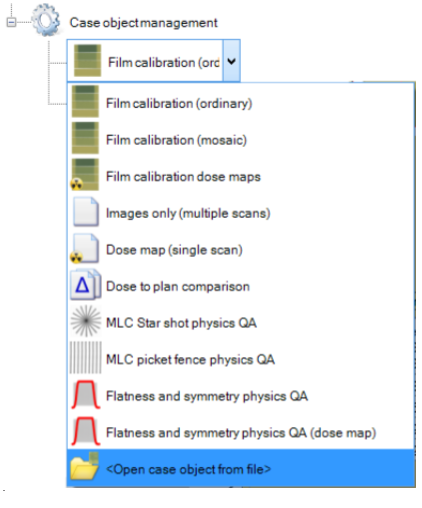
Such fixed calibration file (file extension "CaseObj") can be loaded into a case using the "Open case object from file" option as shown below:
read more >