


filmQA pro™ scanner data window
The Scanner Data Window can be located from “Data” under “Menu.” It allows you to enter scanner information and create scanner lists.
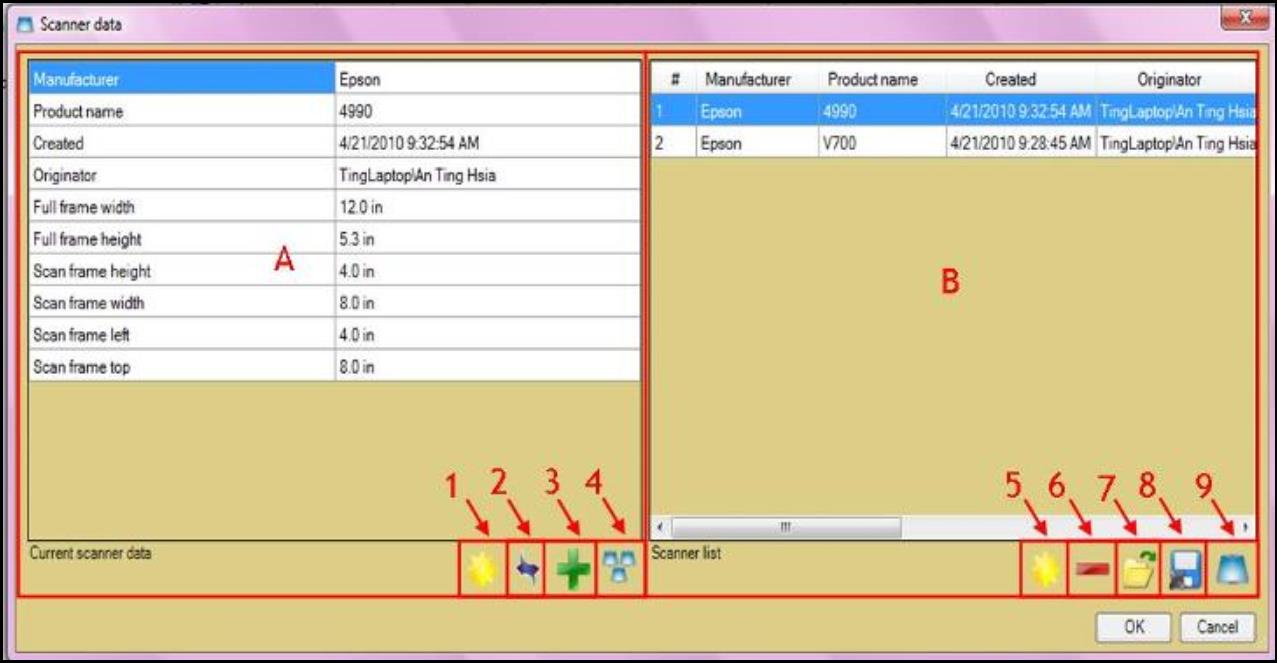
A. The “Current scanner data” panel shows the scanner data that you are currently editing. Right click inside the panel to change the unit of length or the configuration of the table.
Check “Show button bars” to show the icon below the panel, i.e., button 1~4.
- 1. Select the “Renew” button to renew the scanner data origination information.
- 2. Select “Copy” to copy scanner information from the current scanner connected to the computer.
- 3. Select “Add” to add the current scanner to the list displayed on the “Scanner list” panel, B.
- 4. Select “Scanner list” button to show or hide the “Scanner list” panel, B.
B. The “Scanner list” panel shows the scanners contained on the list.
To merge scanner lists, right click inside the panel and select “Merge ‘Scanner list’ when loading from file.” This will allow merge of current scanner list to the existing list saved in the computer.
- 5. Select the “Start new” button to close the current scanner list and start a new one.
- 6. Select “Remove” to remove the selected scanner from the list.Select “Copy” to copy scanner information from the current scanner connected to the computer.
- 7. Select “Open” to open the scanner list from file.
- 8. Select “Open” to open the scanner list from file.
- 9. Select “Scanner data” button to show or hide the “Current scanner data” panel, A.
read more >